1. Project introduction:
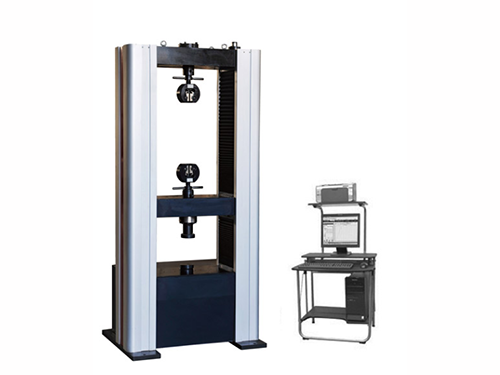
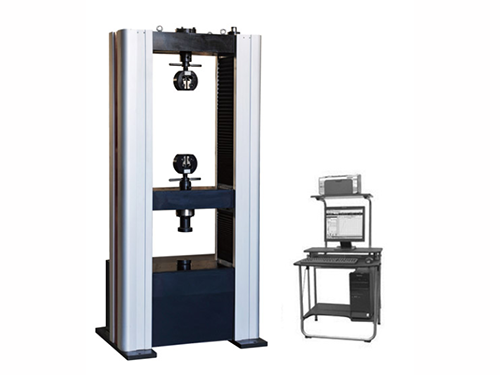
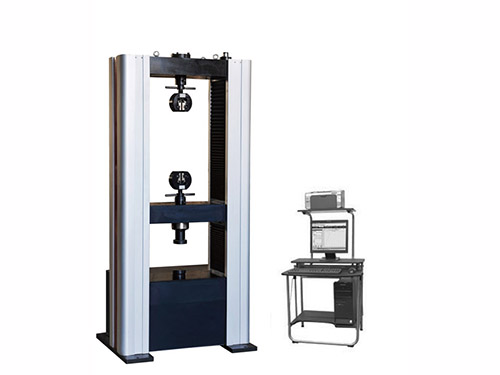
WDW-H series of computer-controlled electronic universal testing machine is a computer designed for universities, research institutes and foreign export control electronics designed for universal testing machine . The computer system controls the rotation of the servo motor through a fully digital controller and a speed control system. After deceleration by the deceleration system, the moving beam is driven up and down by a precision ball screw pair to complete the stretching, compression, bending, and shearing of the sample. A variety of mechanical performance tests, and a wide range of test accessories, have a very broad application prospect in the mechanical performance test of metals, non-metals, composite materials and products. This machine is widely used in materials inspection and analysis in construction materials, aerospace, machinery manufacturing, wire and cable, rubber and plastics, textiles, home appliances and other industries. It is used by scientific research institutions, universities, industrial and mining enterprises, technical supervision, commodity inspection and arbitration, etc. Ideal test equipment. This product is widely used in tensile, compressive, bending and shearing mechanical performance tests of metal and non-metal materials.Equipped with a wide variety of accessories, it can also be used for the mechanical performance test of profiles and components. It also has a very wide range of application prospects in the field of material testing such as ropes, belts, wires, rubber, plastics, etc. with large sample deformation and fast testing speed.
2. According to the standard:
The electronic universal testing machine meets the requirements of the national standard GB/T228-2002 "Metal Material Room Temperature Tensile Test Method" and GB/T7314-1987 "Metal Compression Test Method".
3. Key description:
1. Main unit of electronic universal testing machine: The machine adopts double-space door structure, the upper space is stretched, the lower space is compressed and bent, and the beam is steplessly lifted. The transmission part adopts the arc synchronous toothed belt and the screw pair transmission, the transmission is stable and the noise is low. The specially designed synchronous toothed belt deceleration system and the precision ball screw pair drive the moving beam of the testing machine to achieve backlash-free transmission.
2. Attachment: Standard configuration: one set of wedge-shaped tension attachment, compression attachment, and bending attachment.
3. Electrical measurement and control system:
(1) It adopts AC servo driver and AC servo motor imported from Japan, with stable and reliable performance, and has protection devices such as overcurrent, overvoltage, overspeed, and overload. The speed regulation ratio can reach 1:100,000.
(2) It has protection functions such as overload, overcurrent, overvoltage, upper and lower displacement limits and emergency stop.
(3) The built-in controller ensures that the testing machine can achieve closed-loop control of parameters such as test force, specimen deformation and beam displacement, and can achieve constant velocity test force, constant velocity displacement, constant velocity strain, constant velocity load cycle, Tests such as constant velocity deformation cycles. Smooth switching between various control modes.
(4) At the end of the test, you can manually or automatically return to the initial position of the test at high speed.
(5) Realize the real physical zero adjustment, gain adjustment and automatic shift, zero adjustment, calibration and storage of test force measurement without any analog adjustment links, and the control circuit is highly integrated.
(6) The electrical control circuit refers to the international standard, conforms to the electrical standard of the national testing machine, and has strong anti-interference ability, which ensures the stability of the controller and the accuracy of the experimental data.
(7) It has a network interface, which can carry out data transmission, storage, printing records and network transmission and printing, and can be connected to the internal LAN or Internet network of the enterprise.
4. Description of the main functions of the software
The measurement and control software is used for microcomputer-controlled electronic universal testing machines to conduct various metal and non-metal (such as wood-based panels, etc.) tests, and complete various functions such as real-time measurement and display, real-time control and data processing, and result output in accordance with corresponding standards.
(1) Divided authority management. Operators of different levels have different operating authority, and the contents of operable menus are also different, which makes the operation simple, convenient and fast for ordinary operators, and effectively protects the system;
(2) Real-time measurement and display of test force, peak value, displacement, deformation and other signals; real-time acquisition and control under NT mode platforms such as Win2000 and WinXP; and accurate timing and high-speed sampling;
(3) Real-time screen display of various test curves such as load-deformation, load-displacement, etc., can be switched and observed at any time, and it is very convenient to zoom in and out of the curve;
(4) It has the functions of computer storage, setting and loading of test parameters, and operations such as zero adjustment and calibration are all carried out on the software. Each parameter can be conveniently stored and transferred, so that when a host computer has multiple sensors Can be easily switched, and there is no limit on the number;
(5) Support a variety of control methods, including open-loop constant velocity displacement, constant velocity force, constant velocity stress and other closed-loop control methods; and provide a standard reference curve when the advanced operator adjusts the closed-loop parameters, so that users can actually observe To the influence of each parameter on the closed-loop effect.
(6) The electronic universal testing machine has an intelligent setting expert system for the test process control mode, which is provided to professional users with automatic programming control programmers. Users can flexibly combine multiple control methods and control speeds according to actual needs and compile control programs that suit their needs. The measurement and control software will automatically control the test process according to the user settings.
(7) Analyze data by means of human-computer interaction. The processing method meets the requirements of the widely used "GB/T 228-2002 Room Temperature Tensile Test Method for Metallic Materials", which can automatically calculate various performance parameters such as elastic modulus, yield strength, specified non-proportional extension strength, and manual intervention in the analysis process. , Improve the accuracy of analysis; other data processing can also be performed according to the standards provided by the user.
(8) The test data is stored in text files to facilitate user inquiries, and use any general business reports and word processing software to reprocess the test data, and at the same time facilitate the transmission of data online;
(9) It can record and save the data curve of the whole test process, and has a demonstration function to realize the test curve reproduction. It is also possible to superimpose and compare curves to facilitate comparative analysis;
(10) The test report can be printed in the format required by the user. Users can choose to report and output basic information, test results, and test curve content to meet various needs;
(11) Digital zero adjustment and automatic calibration of test force and deformation are realized, which facilitates operation and improves the reliability of the machine. Various parameter system settings are stored in the form of files, which is easy to save and restore;
(12) It can be applied to various operating systems such as Win98, Win2000, WinXP. Test process control, beam moving speed change, parameter input and other operations can all be completed with keyboard and mouse, which is convenient and quick to use;
(13) It can automatically identify and support external jog control, making it convenient to clamp the sample;
(14) It has the function of automatic shutdown for overload protection, and can automatically determine whether the sample is broken and shut down automatically.
According to different user requirements, the above software functions may be increased or decreased or adjusted.
5. Software and software operation interface:
(1) The electronic universal testing machine software can be in Windows98/2000/XP, and the user interface presents a Chinese window system consistent with Windows style. All test operations can be completed by mouse input on the computer screen.
(2) Displacement control.
(3) Multiple control modes can be selected for automatic program control.
(4) Automatic program-controlled intelligent expert system. Up to 50 steps in automatic process.
(5) The software has a hierarchical management authority setting function, which further ensures the safe use of the software. The software has three levels of management authority, from low to high, the general operator, the senior operator, and the management personnel are logged in by their respective passwords.
(6) Curve display window:
(7) Data analysis:
(8) Curve switching menu
4. Technical indicators:
1. Electronic universal testing machine level: level 1
2. Test force index:
1) Maximum value: 100kN
2) Measuring range: 0.4%-100%
3) Accuracy: better than ±1% of the indicated value
4) Resolution: ±200000 yards
3. Deformation index: (see system configuration sheet for details)
1) Extensometer gauge length: 50mm
2) Maximum measurement: 10mm
3) Measuring range: 2%-100%
4) Accuracy: better than ±1% of the indicated value
4. Displacement:
1) Measurement accuracy: better than ±1% of the indicated value
2) Resolution: 0.001mm
5. Speed:
1) Range: 0.005mm/min ~ 500mm/min stepless speed regulation
2) Accuracy: better than ±1% of the indicated value
6. Host parameters:
1) Stretching stroke: 600mm
2) Compression stroke: 600mm
3) Test width: 600mm
7. Working environment:
1) In the room temperature range of 10 0 C~35 0 C, the relative humidity is ≤80%;
2) Install horizontally on a solid foundation, with a level of 0.2/1000;
3) In an environment where there is no vibration, no corrosive medium and no strong electromagnetic field interference.
4) The power supply voltage fluctuation range does not exceed 10% of the rated voltage ; ![]()
5) The distance between the two sides of the equipment should not be less than 0.8m from the wall to facilitate future maintenance.
8. Force control rate adjustment range: 0.005--5%Fs/s ;
9. Force control rate control accuracy:
1) When the rate is less than 0.05% Fs, it is within ±1% of the set value;
2) When the rate>0.05%Fs, it is within ±0.5% of the set value .
10. Deformation rate adjustment range: 0.02—5%Fs/s;
11. Deformation rate control accuracy :
1) When the rate is less than 0.05% Fs, it is within ±1% of the set value;
2) When the rate>0.05%Fs, it is within ±0.5% of the set value.
12. Accuracy of displacement rate control:
1) When the speed is less than 0.01mm/min, it is within ±1% of the set value;
2) When the rate>0.05mm/min, it is within ±0.2% of the set value.
13. Constant force, constant displacement, constant deformation control range: 0.5%~100%Fs
14. Constant force, constant displacement, constant deformation control accuracy:
1) When the set value is ≥10% Fs, it is within ±0.1% of the set value;
2) When the speed is less than 10% Fs, it is ±1% of the set value
5. Electronic universal testing machine system configuration:
Serial number |
project name |
Manufacturer and specifications |
Quantity |
Remarks |
|
1 |
Mainframe |
self made |
1 set |
||
2 |
AC Servo Motor and System |
Japan |
1 set |
||
3 |
Deceleration system |
Timing belt |
1 set |
||
4 |
Ball screw pair |
Beijing |
2 sets |
||
5 |
Load cell |
Import from America |
1 pc |
||
6 |
transformer |
1.5KW |
1 set |
||
7 |
Extensometer |
Beigang Institute YYU-10/50 |
1 pc |
||
8 |
computer |
Lenovo (current mainstream configuration) |
1 set |
||
9 |
printer |
HP A4 Color Inkjet Printer |
1 set |
||
10 |
Photoelectric encoder |
2000 lines |
1 piece |
||
11 |
Software and measurement and control system |
self made |
1 set |
||
12 |
Random tools, random files |
Instruction manual, installation manual, etc. |
1 set |
||
13 |
Computer desk |
Scaffolding computer desk |
1 set |
||
14 |
The standard configuration Aids |
1 Wedge-shaped drawing attachment |
Flat jaws: 0-7, 7-14, 14-20 (mm) |
1 pair each |
|
Round jaws: φ4-9, φ9-14, φ14-20 (mm) |
1 pair each |
||||
2Compression accessories |
Diameter of pressure plate: φ100mm |
1 set |
|||
3. Bending attachment |
Span 500mm, diameter of pressing roller and supporting roller φ24mm |
1 set |
|||

